
iTerm2 is a terminal editor that replaces OSX’s default terminal application. If you find yourself using the terminal daily, it’s a good time to switch – even just the basic features iTerm2 offers makes the installation worth it. Here, I’ll walk you through how to set a hotkey in iTerm2 in order to open a new window that automatically logs onto the HPC.
Step 1: Download and Install iTerm2.
- Click this link and follow the instructions: http://iterm2.com/downloads.html
Step 2: Set up Password-less log in on the HPC
- Follow this tutorial: https://hpc.oit.uci.edu/HPC_USER_HOWTO.html#HowtoPasswordlessSsh
In your Mac machine:
ssh-keygen -b 1024 -N "" #hit enter; it will ask you to save it as id_rsa, hit y

bash #make sure your commands run through the bash shell

cd #go to your home directory

export UCINETID="$yournetID" #fill in $yournetID with your netID; same for next 2 lines

scp ~/.ssh/id_rsa.pub ${UCINETID}@hpc.oit.uci.edu:~/.ssh/id_rsa.pub

ssh ${UCINETID}@hpc.oit.uci.edu 'cat ~/.ssh/id_rsa.pub >> ~/.ssh/authorized_keys'

#you will have to put in your password twice, after that, you shouldn't need to!
- Make sure to test that it worked by opening a new terminal window and logging onto HPC
Step 3: Learn some iTerm2 features and hotkeys
- Open an iTerm2 window – make sure iTerm2 is in your Mac’s foreground (iTerm2 should be in bold on the top left of your screen) and hit ⌘N
- Make a new iTerm2 tab with ⌘T
- Move between tabs with ⌘1 and ⌘2
- Make a new window with ⌘N, and switch back to the first window with ⌘`
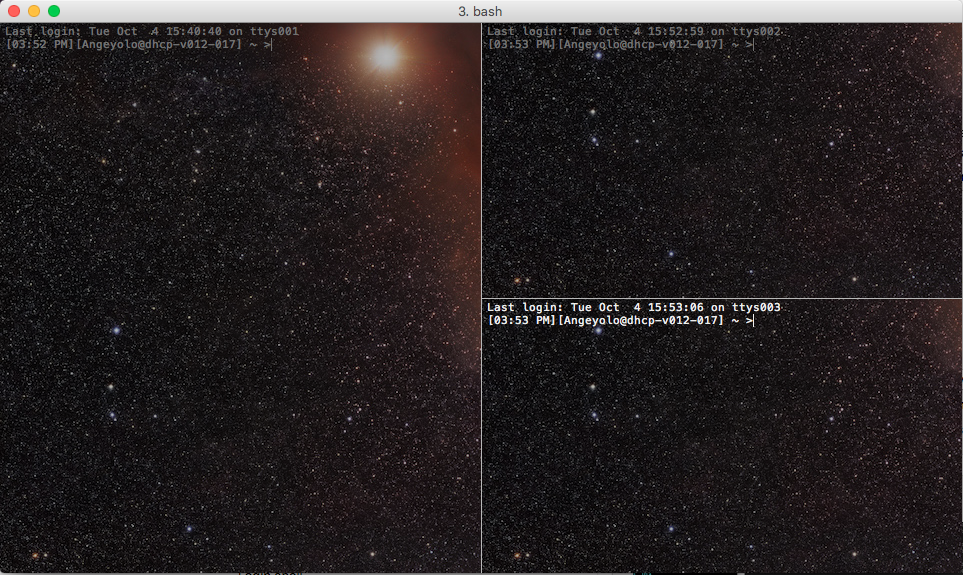
- Go to ⌘1 and make a new split pane. Use ⌘D for vertical, and ⌘+Shift+D for vertical. Your window should look like this (without the cool background of course)
- Close all 3 panes (and second window) with ⌘W
Step 4: Set up a few hotkeys
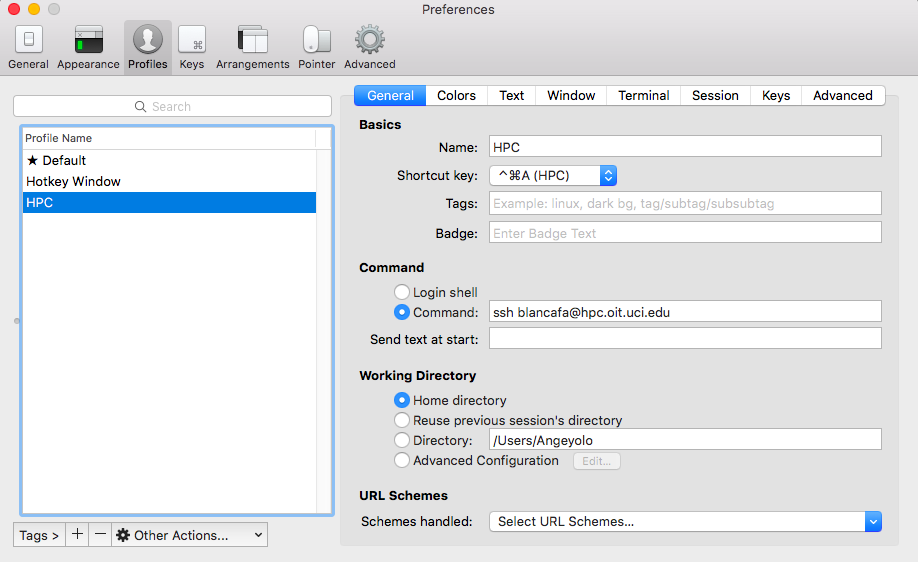
- Press ⌘O to open the profiles options and make a new profile by pressing +. Use these settings:
- Basics
- Name it HPC (or something similar)
- Under Shortcut Key, set a shortcut you’ll remember! Pressing this hotkey will open a new window or tab that automatically logs you into the HPC
- Command
- Under Command, type ssh -Y $yournetID@hpc.oit.uci.edu
- Test it out! Press your Hotkey and make sure it all works.
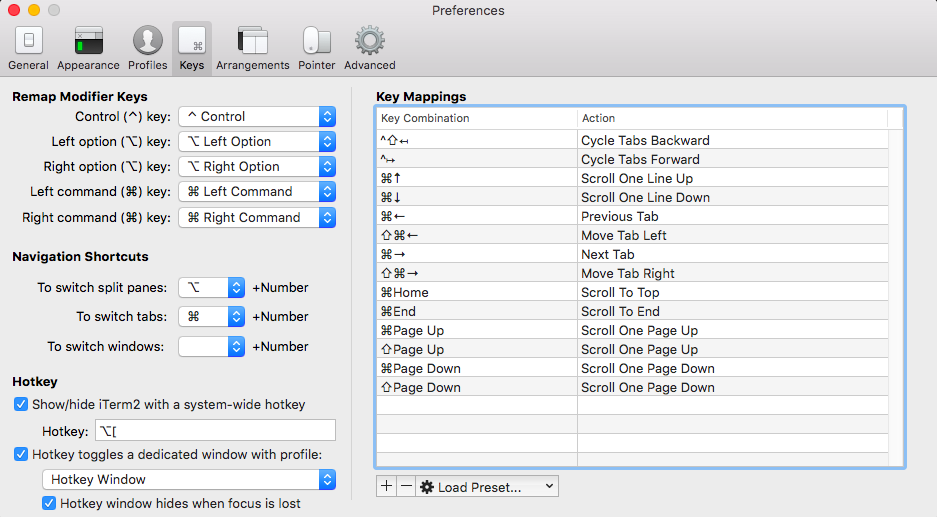
- Press ⌘, to open the preferences, and go to the Keys tab
- Look at Navigation Shortcuts, and set a hotkey so that you can switch between split panes when you make them. (Mine is alt+Number)
Step 5: Customize your terminal aesthetic
Hit ⌘O again and open your profiles. You can choose to edit both your default AND your HPC profile to look different. A few suggestions:
- Under the Window tab, and under Settings for New Windows, change the size of any new windows you make
- Change your background image – NASA’s Picture of the Day is a great source! High res pictures are better. Make sure to check “Tile Image”, that way, when you make your terminal bigger, you’ll reveal more of the image rather than stretch it.
- Change your color scheme. Follow the instructions on this website: http://iterm2colorschemes.com/
- Go to Appearance (under Preferences, not under Profiles) and change your dimming to text only.
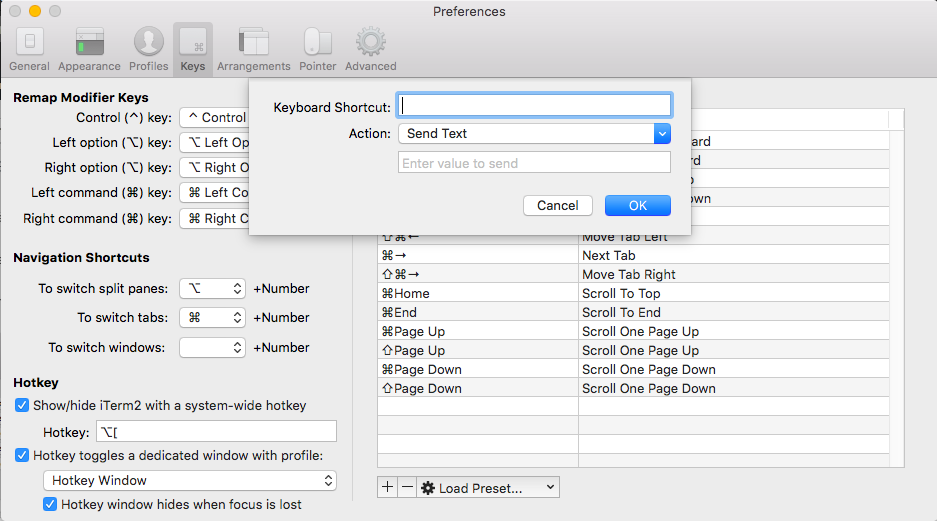
I have separate backgrounds and color schemes on my HPC and Default profile so I can quickly differentiate. There’s a lot more customization options, but the goal here is to make the things you do regularly most efficient: make a terminal window, log onto HPC, and shift between multiple terminal instances. Hotkey shortcuts make it all much easier! I suggest setting a hotkey for any command you do often. You can do that by going to Preferences, Keys and adding a hotkey with the option “Send Text.” Remember to add a newline character, \n.
Happy customizing!